|
"Surrender Betty"
by
Seth Lorinczi
|
|
|
"Surrender Betty" |

Tamiya's 1/48
scale Fw 190F-8 is available online from
Squadron.com
Kit: Hasegawa 1/72
Mitsubishi G4M1
Aftermarket:
Falcon “Clear-Vax” Canopy
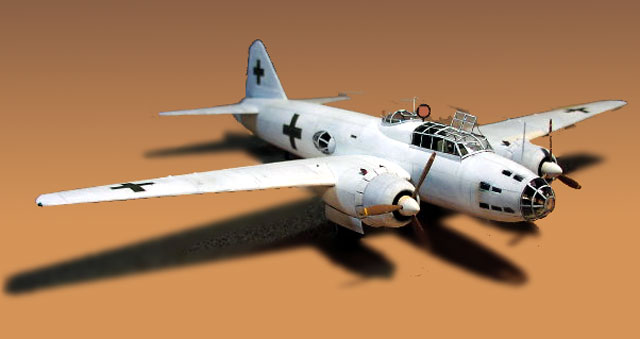
The Mitsubishi “Betty” is my favorite
Japanese airplane. With its rounded fuselage, archaic blisters and
stepped cockpit, it strikes me as the epitome of late-30’s bomber
design. As for its performance against Allied fighters, the less said
the better.
The Betty’s last mission was to carry
the Japanese surrender delegation to Ie Shima. Two G4M’s, hastily
painted white with green crosses over hinomarus, made the trip there.
From the photographic evidence, I’m guessing that one was a converted
bomber and the other was a purpose-built transport, lacking bombsight
glass, RF/DF loop and several small windows. Evidently, only one Betty
made it home: I read the account of a Japanese officer who narrowly
survived a no-fuel ditching en route back to Japan.
I’ve seen built-up models of “surrender
Bettys,” but most are solid white. In fact, the white overcoat was
patchy and uneven. Photographs suggest that the aircraft were painted by
brush and hand, so I decided to try the same.
Although Hasegawa released kits of
late-model Bettys a few years back, the only widely available kit of the
early model in 1/72 is their old (70’s-vintage?) kit featuring
extraordinarily thick plastic, hundreds of rivets and little else. The
first step was to sand off all the rivets and scribe panel lines. Fun!
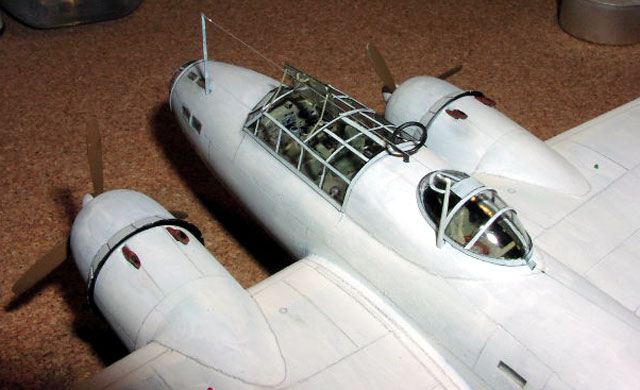
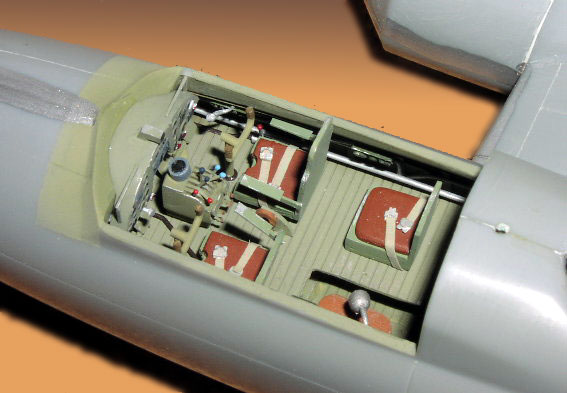
Once that was done, I spent a ridiculous amount of time researching and
recreating the interior, particularly the flight deck and bombardier’s
cockpit. Though there’s a lot of glass there, most details end up
completely obscured. A shame, as I did a decent job of replicating the
tangle of wires, actuators and vacuum lines between the two forward
cockpits. I suppose you’ll just have to take my word on this.
Other than this, construction was
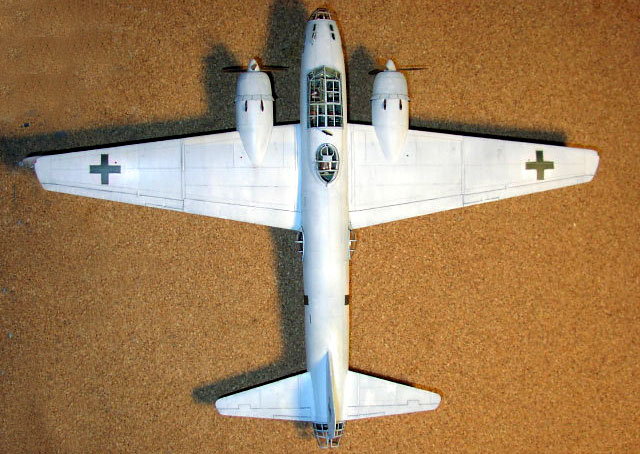
relatively straightforward. I finished the airplane in the standard dark
green over light grey IJN finish, applied decals (minus the tail code)
and overcoated with Future.
Once the clear coat was dry a couple of
days, I thinned white enamel to cut down on brushstrokes and started
painting with a ¼” flat brush, figuring this would replicate the large
brushes (or brooms) actually used. Once the entire airplane was coated
more or less unevenly, I oversprayed with very dilute white enamel to
fill in the most obvious patches. After that came the green crosses,
lightly penciled panel lines, and minimal oil streaks along the nacelles
(visible in photographs taken after, presumably, the aircraft’s first
flight after painting).
I’m more or less happy with the result.
Were I to build the model again, I wouldn’t spend as much time on the
interior. Also, I’d sharpen up my panel-scribing and penciling skills
(remember, white shows every flaw). On the other hand, the finish
closely matches that of the actual aircraft, and the big white bomber
looks great next to my otherwise dark green collection.
Images and Text Copyright © 2003 by
Seth Lorinczi
Page Created 22 May, 2003
Last Updated 25 March, 2004
Back to HyperScale
Main Page
|
 Home |
What's New |
Features |
Gallery |
Reviews |
Reference |
Forum |
Search
Home |
What's New |
Features |
Gallery |
Reviews |
Reference |
Forum |
Search