|
McDonnell-Douglas
F-4E (early) Phantom
II
by Ingo Degenhardt
|
|
|
F-4E Phantom II |
images by Lutz Degenhardt

Tamoiya's 1/32
scale F-4E is available online from
Squadron.com
I had plans to build
an Israeli Phantom of the early 70’s in 48th scale
since the early 1990s. I had even started
some preparations – paints were bought, decals were sourced,
etc. But somehow the project was postponed again and again and so never
came to life.
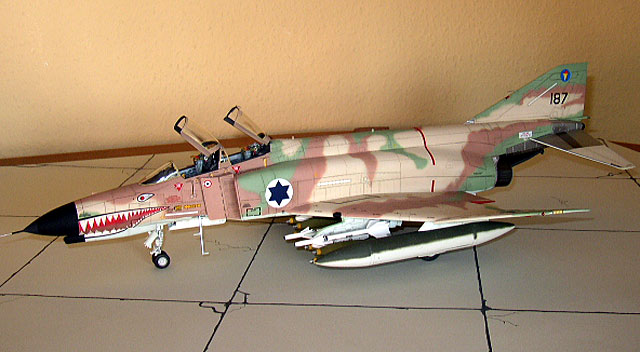
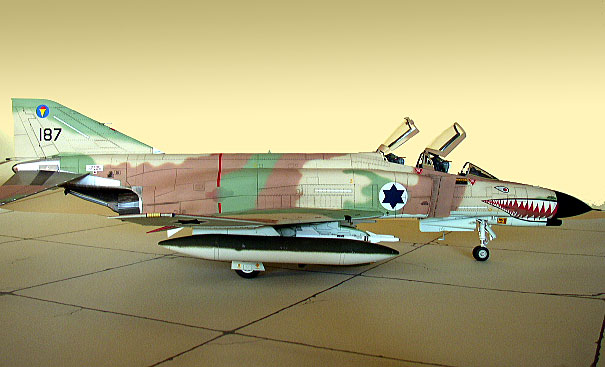
With the appearance of Tamiya’s
F-4E in 32nd scale I finally made up my mind. So it would be
an Israeli F-4E bomber in 1/32.
The known shortcomings of this
kit are still present with it’s now fourth release after the C/D and J
versions. So I started with the laborious task of removing the notorious
raised patches on the one-piece fuselage, by now well known as
“BDR-patches” (BattleDamageRepair). These were all sanded flush to the
fuselage surface and then the panel lines were rescribed. Studying scale
drawings revealed that not all of the panel outlines correspond with the
original fuselage panel lines. So these had to be changed.
Another weak point of the kit
are the intakes. Looking down the intake trunks assembled as Tamiya made
them, there are very large seams inside that are very unrealistic and a
real nuisance. I spent some money to fix this problem and got myself the
‘seamless intakes’ by Cutting Edge. They are not cheap, but were
especially made to deal with the inside of the intakes. This they do
quite well though not perfect and I paid for the improvement inside with
a very poor outside fit of these parts. A lot of filler was required
here.
The complete nose section comes
in clear plastic. The idea behind this is to allow a view into the
fuselage to behold the Radar and Gun assembly. There is a nice example
on the box art of how it could look but I could not make friends with
the idea and went for a completely painted nose and the Radar and Gun
displayed separately. They were not yet ready
when the pictures were taken.

For the Cockpit I used the
ejection seats by Verlinden which are a lot of work but worth the
effort. A few parts of Eduard’s etched-metal detail set for the Revell
F-4F were used also for the cockpit.
The kit supplies the usual
ordnance as before with the F-4C/D release: two 370 gal. Wing tanks,
four Sidewinders, four Sparrows, twelve Mk82 bombs, two MER and two TERs.
Six of the Mk82s are equipped
with fuse extenders but I didn’t want these for this F-4, so I ‘reduced’
them to standard Mk82 by removing the extension and completing the bomb
bodies with fuses. Before that the bomb bodies received a treatment with
plastic glue to give their skin a more rough appearance. Except for two
Sparrows and one MER all of the available external load was used.
Painting
With so many years between the
first planning and the final starting of the model my XTRA-Colors for
this project were well over ten years old. In fact there was even rust
on the cans but they worked very fine without any problems. I had
several colour drawings for Israeli F-4 camouflage schemes of the period
and finally had to decide between two possible patterns. I finally went
for the scheme used on the model after I found this on all my rare
colour photographs. Anyway information about Israeli Phantoms from the
time of the Yom Kippur war is very hard to find – even now. My books
were nearly useless and even searching the net did not bring up the
amount of information I expected so part of the model’s appearance is no
more than a good guess.
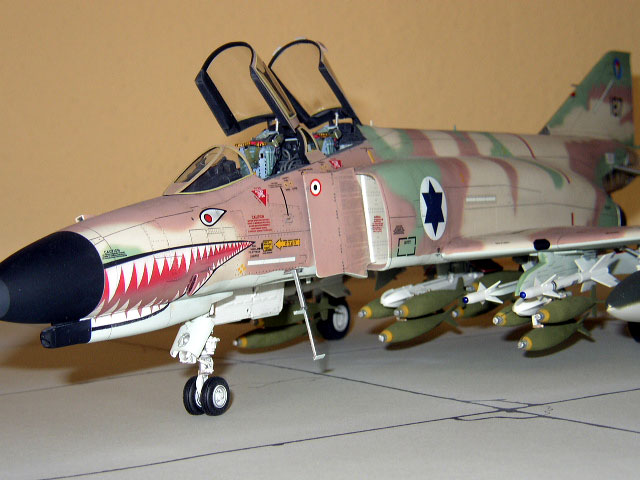
I definitely wanted my F-4E with
this oversized sharkmouth found on some (or may be only a single one)
Phantoms. I bought CAM Decals’ No. 32-083 for the purpose but had to
find out that the sharkmouth was so large that it even covered the front
of the air intake scoops on the forward fuselage sides. There was no
chance to use the decals. So the complete sharkmouth was sprayed on
which required extensive and careful masking.
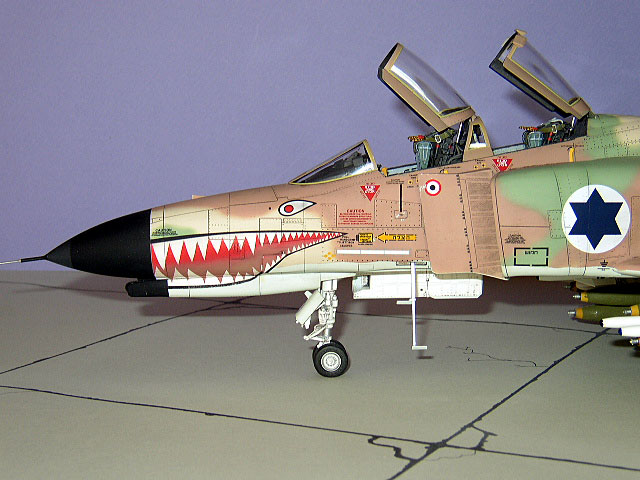
As also seen on photographs, I
simulated oversprayed US-national insignia on the fuselage and wings.
This seems to have been done not always very carefully, but more in a
quick-and-dirty way. So for example there is a large gap in the red
fuselage band on either side. I cut out the US star&bar decal from the
kit’s decal sheet and used the sheet as a spray mask. The colours used
were slightly darkened.
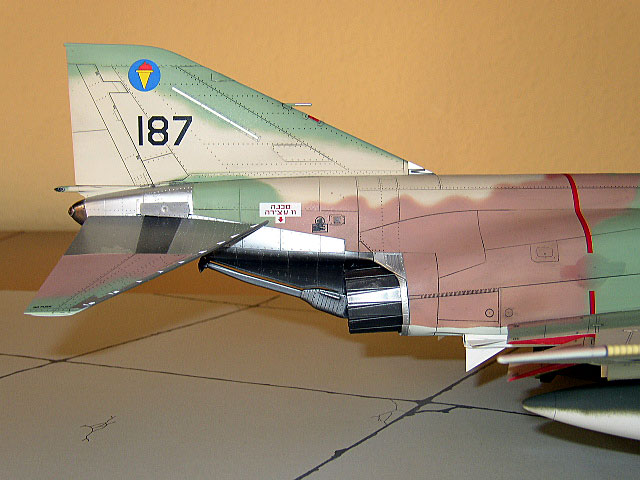
One of my colour photographs
shows a flight of three Israeli Phantoms with at least the nearest
aircraft carrying wing tanks of a significantly darker green top colour
compared to the light green on the aircraft itself. To me it looked like
the wing tanks were painted US-style of FS34079 over FS36622 although
there was no visible difference in the underside colours of tank and
aircraft. But FS36622 Light gray is not so very far from FS15622 pale
blue...
May be my imagination ran a
little wild but I thought it possible the Heyl’ Ha Avir may have
received some 370gal. fuel tanks painted in USAF colours during the
hastened deliveries from the US after the Yom Kippur war started.
Unlikely? Impossible? I decided otherwise and happily painted the tanks
US style. One more guess on this model...
FS30219 Tan is prone to
deteriorate fast and heavily. I mixed it with a little white and red to
give it this slightly pinkish hue.
Decals
This Phantom is Serial No. 187
during 1972/3 and the mentioned CAM Decal sheet plus TIGER WINGS’
Phantom stencils were used for the model. The stencil sheet includes
some of the major warning stencils in Hebrew as can be seen on some of
the images.
No. 187 was exactly the aircraft
shown on my only real good close-up picture of a sharkmouthed Phantom.
CAM Decals state on their instructions that ‘there is no proof’ of the
use of the included kill marks and squadron insignia on this aircraft.
So they had some difficulties too, gathering information...
Definitely 187 had the long gun
muzzle and formation lights – provided by CAM as glow-in-the-dark decals
– it works...
The sharkmouth is clearly seen
on this photograph and so it was used as a painting guide. Unfortunately
it does not show if the fuselage band and squadron insignia were on the
aircraft or not so I had to decide on my own.
I could not resist using one of
the kill marks too. It’s location on the model, the left splitter
plate, on the photograph is covered by a ground crewman...
It is hardly visible, but it
looks like 187 did not have the ECM acorn on the fin tip. The model
provides both fin caps and so I used the one without the acorn.
The CAM Decals are very thin and
quite nice to work with, but their tendency to ‘suck’ into the panel
lines was very limited, despite the proper use of Micro Sol/Set. So I
was even more glad not to have tried to use the sharkmouth decal. The
TIGER WINGS decals went on without problems. I suffered only very little
silvering.
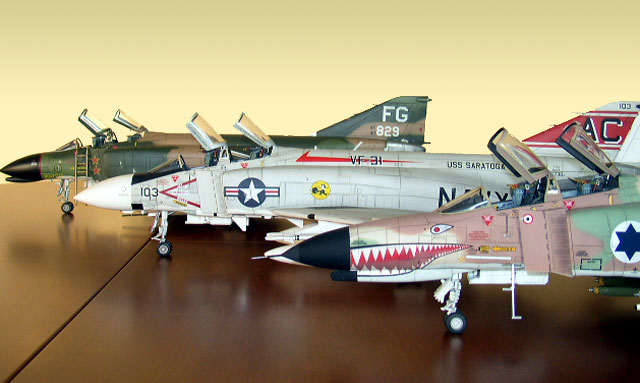
This was No. 3 of Tamiya’s 32nd
Phantoms I built and the first one on which I removed the BDR-patches –
this adds a good deal of work to the whole thing. Also this is not one
of my cheapest models with all the aftermarket stuff used although the
Eduard parts are still nearly complete and wait for Revell’s F-4F.
I didn’t expect to find so
little detailed information about an aircraft that was brand new to the
IAF over 30 years ago but I would have had even less without the help of
the people mentioned below.
May be I went a little too far
with the wing tanks but building this big Phantom was fun as it always
is and finally I have my Israeli Phantom.
Thanks for information and
pictures
Click on the thumbnails
below to view larger images:
Images and Text Copyright © 2003 by
Ingo and Lutz Degenhardt
Page Created 22 May, 2003
Last Updated 25 March, 2004
Back to HyperScale
Main Page
|
 Home |
What's New |
Features |
Gallery |
Reviews |
Reference |
Forum |
Search
Home |
What's New |
Features |
Gallery |
Reviews |
Reference |
Forum |
Search