|
Hasegawa's 1/32 Scale
Focke-Wulf Fw 190D-9
by
Chris Wauchop
|
|
|
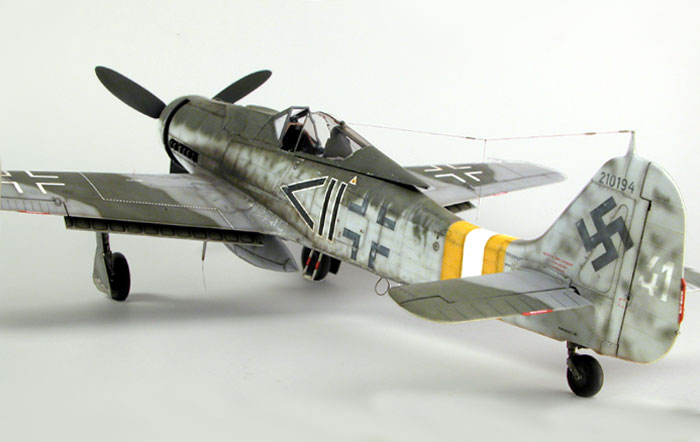
Focke-Wulf Fw 190D-9
Stab./JG 2, near Aachen Germany, 1 January 1945, Fw Werner
Hohenburg |
images and text by Brett Green

Hasegawa's
1/32 scale Fw 190D-9 may be ordered online from Squadron
Chris Wauchop's great liking
for the Focke-Wulf Fw 190D-9 meant that he dropped all his other projects
when the Hasegawa 1/32 scale kits came into his hands.
Armed with EagleCal's
release EC#57, he set about building the kit with only minimal
modifications.
Chris's only addition to the interior was a harness from
lead foil and buckles shaped from fine soldering wire.
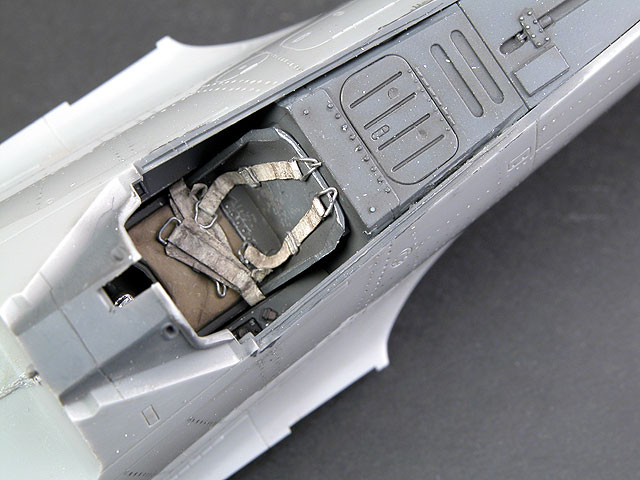
The canopy was dipped in Future with good results.
This early Dora had the five-piece gun cowl, so the panel
lines on this part did not need to be filled and sanded.
The biggest task was adding rivet detail to the fuselage
sides. Chris applied this detail for the full length of the fuselage from
the nose to the empennage, with special attention to the area around the
cockpit.
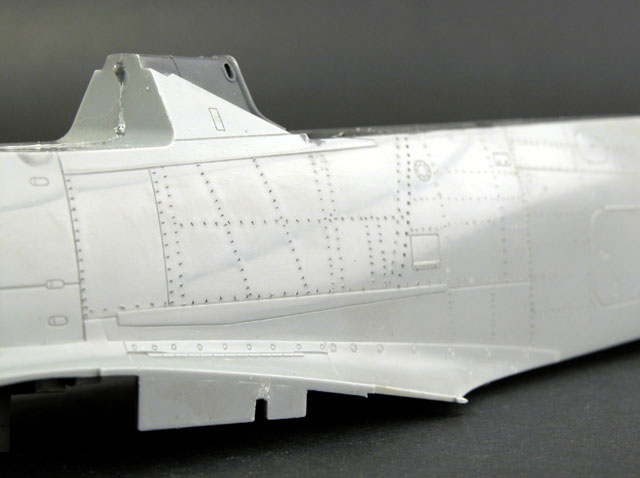
His technique was to first draw the panel lines onto the
bare plastic using a 2B pencil, then marking the position of each rivet
with the same pencil. The "rivets" themselves were created by pushing then
twisting the point of a new scalpel blade into every pencil-marked
position. Chris commented that this technique seemed to take forever!
After completing the fuselage, he did not feel like doing the same for the
wings.
Click the thumbnails below
to view larger images:
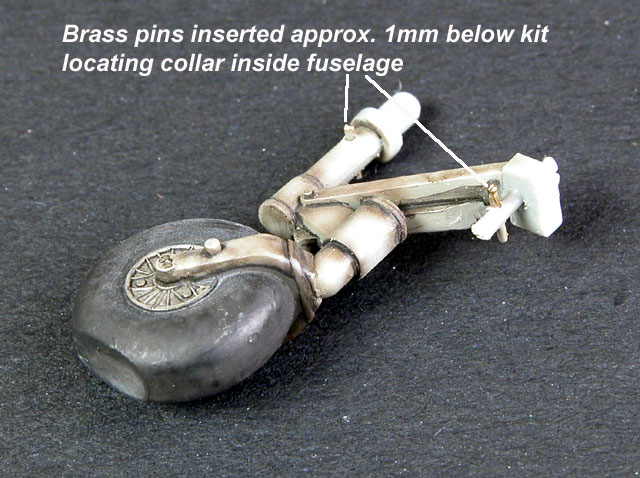
The height of the tailwheel on operational Fw 190D-9s
seemed to vary widely. Chris decided that the kit tailwheel assembly
looked too high, so he added brass pins to the tail strut and oleo to
retract the assembly somewhat.
Other additions and modifications include:
-
A replacement DF loop formed
from a staple securing one of the polythene bags in a Tamiya kit. Chris
uses Tamiya staples exclusively for this task!
-
The short FuG antenna on the
fuselage was replaced with brass wire, beefed up at the base.
-
The whip aerial at the end of
the Morane mast was replaced with wire.
-
Cannon and machine gun barrels
were drilled out with the tip of a scalpel blade.
-
Hydraulic lines were added from
fine soldering wire.
-
Aerial was sourced from smoke-coloured
invisible mending thread. The isloators were built up from drops of
Krystal Kleer then painted.
-
A lens for the gun camera was
added using Krystal Kleer.
-
The missing section of
instrument coaming crash-pad (behind the gunsight) was filled with a short
section of stretched sprue.
Chris finished his Dora using decals from EagleCals' 1/32
scale release, EC#57. This set includes four interesting options.
Chris's choice was a machine from the Staff Flight of JG
2, with its characteristic yellow-white-yellow RV bands.
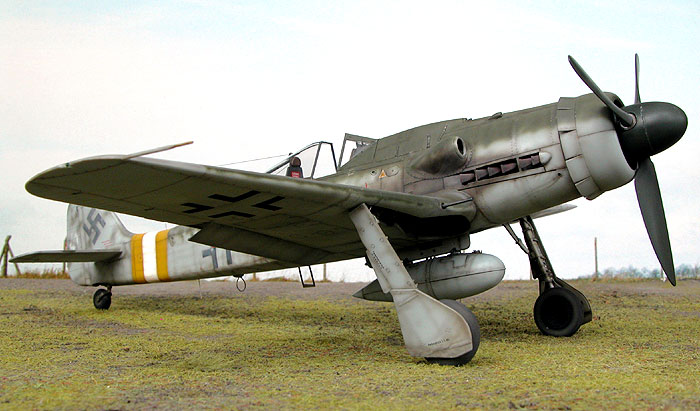
The first painting task was the RV band. White was applied
then masked, followed by the two yellow bands. These in turn were masked
and the rest of the airframe was painted. The Testor Aztek A470 airbrush
was used to spray Gunze acrylic paints. Upper surface colours are RLM 74
Grey Green and RLM 75 Grey Violet. The lower surfaces are all RLM 76 Light
Blue.
After the masking tape on the fuselage band was removed,
Chris applied national markings only to the fuselage and the fin. These
markings were lightly oversprayed with RLM 76 Light Blue before receiving
some additional spot weathering. The green upper surface camouflage colour
was also sprayed around and over the upper section of the fuselage
crosses. This interesting feature can be quite clearly seen in reference
photos. The enigmatic "41" on the rudder was applied next, and oversprayed
per the reference photo.
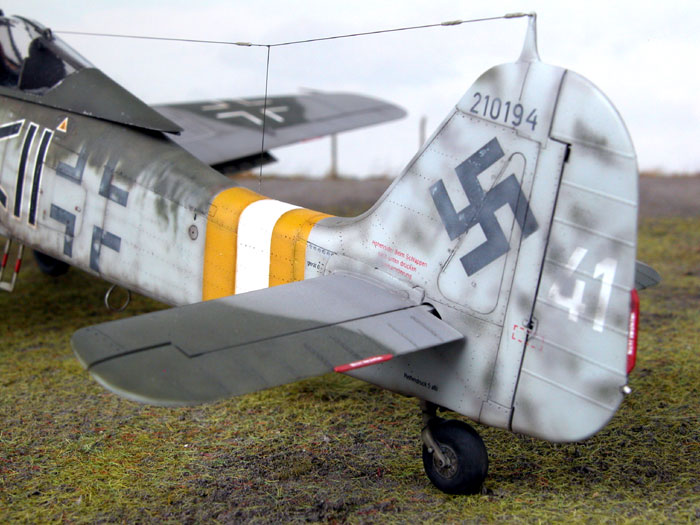
The remaining markings were now added.
Chris especially liked the fine fuselage walkway lines,
but all the decals performed flawlessly on his model.
Click the
thumbnails below to view larger images:
Model by Chris Wauchop
Images and Text
Copyright © 2003 by
Brett Green
Page Created 13 May, 2003
Last Updated
25 March, 2004
Back to
HyperScale Main Page |
Home |
What's New |
Features |
Gallery |
Reviews |
Reference |
Forum |
Search