|
Morane Saulnier N
by Bill Bunting
|
|
|
Morane Saulnier N |

Eduard's 1/48 scale Morane Saulnier N is available online from
Squadron
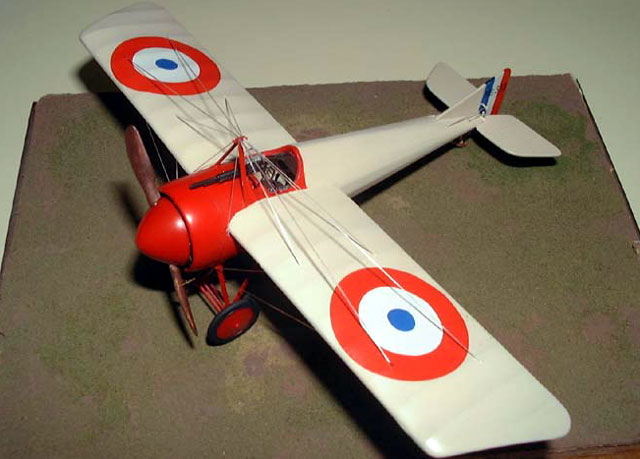
Here is Eduard's 1/48 Morane Saulnier N
This is my first attempt at a ”limited-run” kit. It really wasn’t that
difficult, but I have heard from other builders that Eduard is the best
of this genre and almost “mainstream”. This was in my partially
completed pile for 4 years.
I had built the cockpit and put the fuselage
together and then picked it up again this last January for the "Model
per Month" challenge.
I finished it it about 10 days!
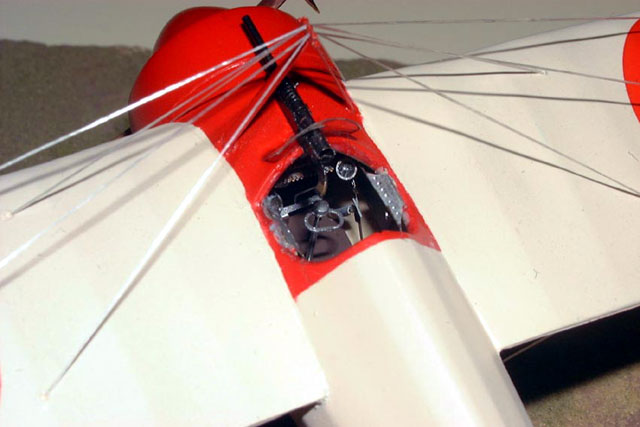
Construction starts with the cockpit and fuselage.
The interior is built up from mostly photo etched
and a few plastic parts and looks very complete. Next, I drilled all of
the holes that would be required for rigging and locating holes for the
wings, photo etched landing gear and struts. Special care was required
in attaching the wings to the fuselage. The joints are “butt” joints and
are on an angle because they are shoulder mounted to the top of the
round profile fuselage.
I drilled holes in the wing roots and the fuselage
and used pins to reinforce the joint. It was necessary to dry fit a
number of times to get it right. The tail was straightforward and the
landing gear went smoothly.
The upper and lower struts were excellent fits.
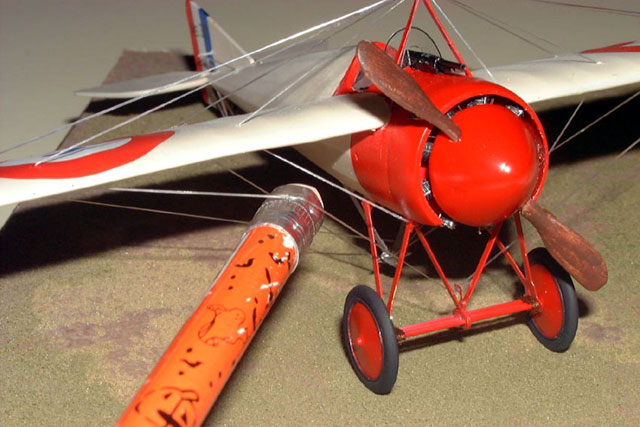
Painting was done with Polly-S “Linen”, the red
cowl, struts and landing gear was done with Tamiya X7 red.
 After a coat of Future, the kit decals were applied
using “Mr. Mark Softer” with no problems. Polly-S flat was used to
finish. After a coat of Future, the kit decals were applied
using “Mr. Mark Softer” with no problems. Polly-S flat was used to
finish.
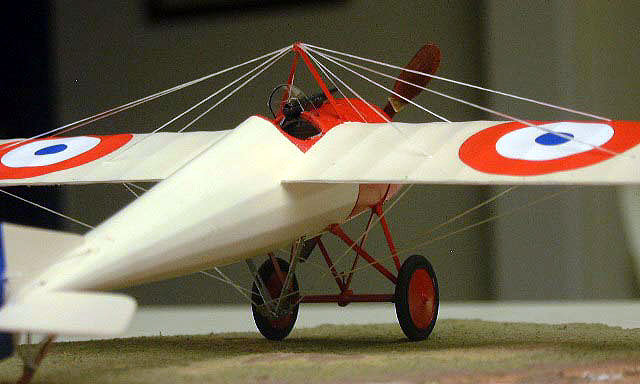
Rigging was something I was not looking forward to.
I had never done it before and I was worried that the thread would go
slack or break. That was until I discovered some very neat fishing line.
It is called “SpiderThread” and is used to tie up
little sacks of fish roe to be used as bait. I bought it at “Canadian
Tire”, a chain store in Canada – sort of a “automotive
parts/hardware/sports” store. I got 100yds for $3.99. I am sure that it
would be available from any good fishing supply store.
The unique thing about this thread is that it
stretches. It is almost like rubber or latex in composition.
I rigged the plane by anchoring one end of the
thread on one of the strut posts with cyano. When thoroughly dry, I
threaded the line through a hole in the wing, over the next strut post,
through the corresponding hole on the other wing, the thread was then
brought back to the originating location and glued with cyano. I found
it easier to leave lots of excess line when starting and finishing.
Once dry, the excess was trimmed with a very sharp
blade be sure to cut the excess off the “starter” before you bring the
“finishing” end back (you’ll understand as soon as you do it). I put a
drop of cyano into each hole and then touched up the paint.
The beauty of using the “SpiderThread” was that by
putting a little tension on the line while rigging I eliminated any
slack and also was never in danger of over stressing the struts or
breaking the thread.
I will be building more Eduard kits in the near
future and rigging is a “cinch”!
Model, Images and Text Copyright © 2003 by
Bill Bunting
Page Created 18 May, 2003
Last Updated 25 March, 2004
Back to HyperScale
Main Page
|
 Home |
What's New |
Features |
Gallery |
Reviews |
Reference |
Forum |
Search
Home |
What's New |
Features |
Gallery |
Reviews |
Reference |
Forum |
Search